Wednesday, July 27, 2011

It's HOT outside: Iced Coffee


We live in the DC area and maybe you've heard but we are going thru a teensy, tiny heat wave...average high temp for the last two weeks has been 95 degrees with an average low of 80 (at NIGHT!!)...to me: that is WAY too high and not nearly low enough...but this wouldn't be SO, so terrible if the humidity wasn't pushing the heat index to into triple digits.  (Last week we had one day of 78% humidity!!) 

So, that made 94 degree day feel like a 111 degree day.  Nice.  

There was a local effort to name this weather situation without attaching "ageddon" or "pocalyspe." Both of those suffixes had been worn out by the massive snow storm we had in 2010.  


My top favorites:

5.  The Humidity Is Too Damn High heat wave.

4. Scorch-a-palooza

3. Beltway Meltaway

2. HyperSizzleWave-2011 

1. The Sweat Ceiling


Anyway, all this is just to say that the one thing bright star, the one redeeming factor, the one thing that makes it all ok...is that this weather is the perfect excuse to consume lots and lots of ice coffee!!  Pretty much the perfect drink.  I love ice coffee...A LOT and I love it even more since I discovered how incredible it can be when made using a cold-brew process.  And how easy too...


Just for the record, my iced coffee making technique had long ago evolved past dumping a bunch of ice cubes into a hot cup of coffee...I was not doing this but I would make hot coffee...add sugar (stirring to dissolve) then stash in fridge till cold AND then drink...which was fine, I guess. Kind of bitter...

Then the skies parted, the choir began to sing and I learned to do this:

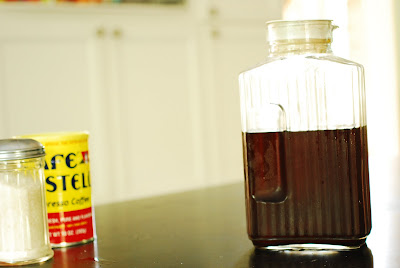
Take pitcher.  Add 1/2 gallon cold water.  Add 6-8 ounces of the strongest ground coffee you have.  Stir/shake to combine.  Cover and let sit on counter, at room temperature,  for 8-12 hours.  Strain grounds out. (I place a coffee filter over sieve and let coffee drain into large bowl.)  
Put strained coffee back in cleaned out pitcher.  Stash in fridge for up to 2 weeks.

THAT IS IT!! Seriously...it could not be easier or simpler.  And what you get is a smooth, very clean brew.  Its kind of amazing really.  Kind of like sun tea but, uh, without the sun...


Then, what I do, is pour the coffee into a glass (without ice).  I add my sugar, stirring to dissolve. (it actually doesn't take much...)  Then I add the ice and milk.  I watch it for a second because it looks so pretty and swirly and then I stir.  Perfection.  In a glass.


And the perfect foil to THE SWEAT CEILING!!!

Enjoy!


Monday, July 25, 2011

Farmer's Market


One of the best things about going to the farmer's market is that you just never know what you are going to end up with...I mean, you might have an idea--or you may even have an agenda...but kind of when you get there you (or, I, at least...) gravitate to what catches your eye; what looks the prettiest, the freshest and what you couldn't stand to do without... Last week, what looked especially nice to me was: the peaches, the baby red potatoes, the haricot verts and the squash blossoms...


I felt fairly confident in my ability to make a peach pie (which turned out really well!) and one of my favorite summer-time salads is one with potatos dressed with olive oil, champagne vinegar, a little chicken stock...fresh herbs and haricot verts...so, I knew we would have something tasty there...

but it was the squash blossoms that I found I could not pass up... Honestly, though, I was a little daunted on what to do with them...I mean, I know that your stuff them with ricotta cheese and fry--but I had never tried that so I was intimated...but then I snapped to it:  how hard...could it be, really??


Turns out: not too hard at all and they are so delectable!  I found my recipe in the July issue of Bon Appetit and a similar recipe can be found here. (Don't skip mixing in mint with the ricotta as the stuffing, it adds an amazing flavor and the ones I made added a bit of lemon zest which was wonderful as well.)  I didn't do the dipping sauce--we just ate them plain and honestly, they were so good...I am kicking myself that it took me so long to get around to trying them!!  Be sure to pick some up the next time you go to your local farmer's market and try it...you will be glad you did!!


Friday, July 22, 2011

LUCA IS FOUR YEARS OLD TODAY!


oh...our little baby turns 4 years old today...hard to believe; time goes by so fast--I don't think you ever really grasp how quickly time does goes by until there are little kids around.  They compound this notion ten-fold.  Luca is our big boy now: diapers are long gone, he is swimming on his own, his letters and his numbers are starting to get really good.  No one makes us laugh like he does and he has an amazing way with words.  

We love you Luca...its been amazing to watch you grow.


Tonight, its pizza and presents and tomorrow its a pool party with friends.  
Happy Birthday, our little prince--WE LOVE YOU!!


Wednesday, July 20, 2011

Recipe: What I did with all those tomatoes


I made a tart...with goat cheese and roasted garlic--and lots and lots of tomatoes.  Homemade crust, fresh basil and a sprinkling of Parmigiano-Romano.  It was really, really good.  And pretty too!!  

Total summer-time and perfect with a light salad. 


If you can bear to turn on your oven: roast a head of garlic (wrapped in aluminum foil, sprinkled with olive oil, roasted at 450 degrees for 45 mins) Squeeze out the melty-liquid gold and spread it onto the uncooked tart-crust...layer goat cheese (or fontina or whatever you like) on top of that, sliced tomatoes on top of that--sprinkle with parmesan cheese and olive oil...and bake for another 45 minutes at 400 degrees.  


If you make this, you will not be sorry...I promise!!


Complete recipe here.


Monday, July 18, 2011

My Ode to the Tomato


I don't really have the words to express my deep-down love for this amazing fruit so I hope my photos say what I can't...and to make things extra wonderful, I am doing back flips over how well our plants did this year.  I am in heaven with all my tomatoes.  We are reaping what we sowed and I couldn't be happier....

Our tomatoes are gorgeous--The delicious, sun-kissed jewels of summer time.


But this is just the beginning--we will see how happy I am in two weeks when I cry "uncle!"


I think I took over a hundred photos, to express my love and devotion.
 Here are just a few..


I am not sure yet what we are going to do with this crop, but will let you know when I figure it out.

Am thinking about making a tomato tart...

Friday, July 15, 2011

Cocktail: Pimm's Cup No. 1


I guess its official: I am on a cocktail kick...but its more than only drinking cocktails, because I still want to drink wine with dinner.  I am learning that there are so many wonderful drink flavors and great combinations of tastes (especially for summer!) out there--its like a whole new world and I just want to mix things up a bit... literally and figuratively with my pre-dinner drink.  Plus, I love the whole notion of an aperitif...An aperitif is usually served before the meal to stimulate the appetite...the whole notion reminds me of Parisian or Roman cafes circa 1890...seems so civilized--so this is my new thing.


Last year for my birthday, we went to The Tabard Inn for a delightfully delicious meal in this historic (one of the oldest in DC!) and quirky restaurant/hotel.  The Tabard is known for its famous chefs, New American cusine and using only what is local & seasonal.  For a change of pace, I ordered the house cocktail instead of going right for the standard glass of wine.  It was a PIMM'S CUP.  I had no idea what is was...but it was DELICIOUS and I have thought about it ever since.  So, this year, I decided to find out what it was and how to make it.


From Wikipedia:

Pimm's was first produced in 1823 by James Pimm, a farmer's son from Kent who became the owner of an oyster bar in the City of London. Pimm offered the tonic (a gin-based drink containing quinine and a secret mixture of herbs) as an aid to digestion, serving it in a small tankard known as a "No. 1 Cup", hence its subsequent name.

Pimm's No. 1 Cup is based on gin and can be served both on ice or in cocktails. It has a dark tea colour with a reddish tint, and tastes subtly of spice and citrus fruit. It is often taken with "English-style" (clear and carbonated) lemonade, as well as various chopped fresh ingredients, particularly applescucumberorangeslemonsstrawberry, and borage, though nowadays most substitute mintGinger ale is a common substitute for lemonade. Pimm's can also be mixed with champagne (or a sparkling white wine), called a "Pimm's Royal Cup". 

Its base as bottled is 25% alcohol by volume.


So, it started out as a liquer or an aperitif, very low in alcoholic content, to mix with Gin.  A Pimm's Cup is very popular in England--kind of like the State drink!  But what the English call "leomonade" we call lemon/lime soda.  Think 7-Up!!  This is really a wonderfully refreshing drink because you add a couple ounces of Pimm's to glass of ice with lemon/lime soda, stir and garnish with a cucumber spear.  Ginger ale also works well.   It tastes summery and a little bit spicy and it's like it was meant for the cucumber!!  Plus, since its low in alcohol, it won't bowl you over...


Then, I found a Pimm's Cup Punch recipe (adapted from Martha Stewart)...I made a batch of this recently and its SOO good.  In a pitcher combine:  

2 parts (real, American) leomande
2 parts Ginger Ale
1/2 part Gin
1/2 part Pimm's

lots of ice...stir and garnish with lemon and cucumber slices.  


Really, really wonderful and surprisingly light and summery.

I promise, once you try this--you will only want to drink wine with dinner too!

Wednesday, July 13, 2011

Recipe: Home-made Ricotta


Six or seven years ago (way before I had developed confidence in my DIY abilities) we were at a dinner party and friends of the host/hostess brought home-made ricotta to the dinner table.  I nearly fell over with amazement and wonder...I can still hear myself: "you made WHAT??"  "You made this?  Seriously!?!  It is so delicious--I can't believe you made home-made ricotta cheese!!"  (ok, times this by 10 and that is about  how I carried on...needless to say, I was blown away and totally impressed I think, in a former life, I was a Italian peasant farm woman or at the very least a Italian peasant farm woman is trapped in my current self.  And even though I thought it was incredibly cool to make home-made cheese...I was completely daunted by the thought of it and never even really looked into making it.


Ok, just stop right here...if you have ever been daunted (like I was) by trying to make home-made cheese--(ricotta to be specific) you can hold your head high and get right to it.  It takes all of about 25 minutes to make and the easiest, creamiest, most delicious thing EVER.  I got my recipe from Ina Garten, the Barefoot Contessa.  You can get her delicious recipe here.  Truth be told, authentic ricotta is not made with cream (just milk) but since is Ina--it's over the top, as usual.  


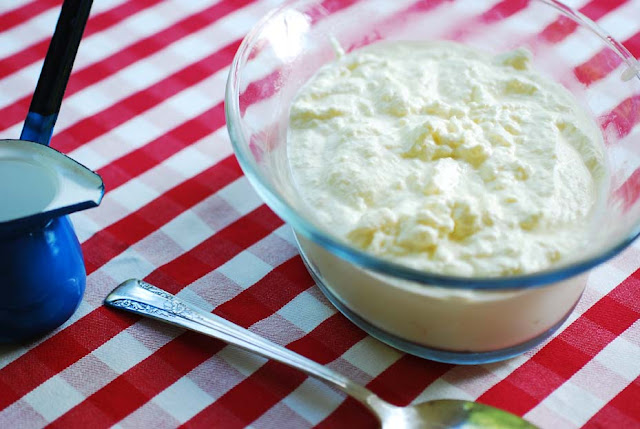
To start, you begin with adding 4 cups milk and (ahem) 2 cups heavy cream and salt to stainless steel or enamel coated pot.  Stirring occasionally, bring to boil.  Turn off heat and add good quality white wine vinegar--I had champagne on hand so that is what I used.  Allow the milk/cream to curdle.


Line a fine sieve with cheese cloth and place over a bowl.  Pour mixture in and allow it to separate.  The curds will stay (the cheese) and whey is the liquid part that will drain out.  Allow to sit for 20-25 minutes...the longer it sits, the thicker it will be.


Transfer to bowl and SERIOUSLY, that is it...do you know how silly I felt once I discovered that was all there was to it??  Well, lesson learned: if you want to make it--don't be intimidated...you just might be surprised at how easy something is to make.  

I kind of love that!! 

And I kind of love fresh herbs chopped and mixed into my home-made cheese served with a light green salad (using same champagne vinegar to dress the salad as I did to make the ricotta.)

Delicious!!  


Buon Appetito!


Monday, July 11, 2011

GREG MADE! New Front Porch!!


We live in an old farmhouse that was built around 1918.  It is a wonderful old house and we love it, but when we bought it a little more than a year ago, we said the first thing we were going to do in terms of home improvement was to tear down the terrible, horrible, weird, oddly built enclosed front porch.  This was priority number one for me.  According to our neighbors across the street...the enclosed front porch had been there as long as they had been there--and that is 47 years.  (They moved into the neighborhood in 1964.)  So, the added on porch was built before that...we figure sometime in the 50s....this is what it looked like a mere 3 days ago....


Inside: The front door is painted oddly, but the side and top window treatments are actually quite lovely but you would never know it as it was...


Looking the other way...basically this enclosed space acted a garage for previous owners of the house...Personally I can think of nothing worse than be welcomed into a home by all your unsightly junk...not my idea of homey.   And we are trying to figure out why this structure was even built on in the first place...Eventhough whoever built it, did do a solid job, it was hot in the summer and cold in the winter...not exactly the place you want to hang out...

So, it started coming down!

My husband Greg had slowly started to dismantle it over the last several months...first taking out the paneling, then the insulation...the electrical, the ceiling beadwood paneling.  Everytime he took layers away he would be covered by decades of dust, soot, old wood rot.  As the layers started coming away, it was like looking back into time.  The old wood beams and insulation had logos of American companies from long ago...


Everything was stamped MADE IN THE USA.
kind of made me a little sad...

But, ANYWAY! I digress...so the new beams were ordered and delivered, Greg lined up help with our wonderful friend Josh and the big day arrived...

The windows came out.


Magda and Luca looked on with wonder...


The walls came out and the support 2 x 4s went in.


The beams were fitted.  And our dream of having a lovely front porch was getting closer every minute!!
After two solid days, a minor injury to the face and a chipped bone in his thumb (don't ask) Greg once again proved that he is a master mind and a master builder.  I am so proud of him--he spent A LOT of time thinking about this project and every moment paid off...

The ceiling, the railing, the fans/light, stairs, painting still need to happen (Also, the porch swing and the rockers, too) but its a HUGE VAST IMPROVEMENT and I am so happy.  Now I love the outside of my house as much as I love the inside...Thanks Greg--I love you!!!